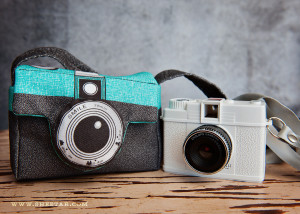
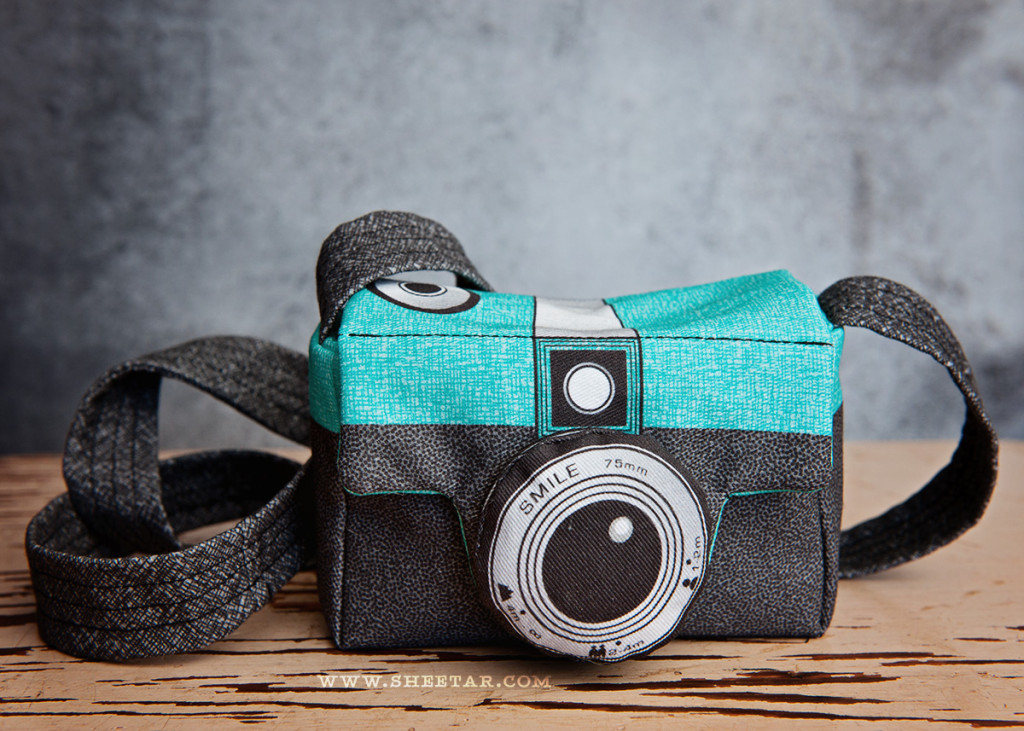
 I’ve been on a sewing kick! Between starting the Spoonflower Instagram Cheater Quilt challenge and finishing this project, the sewing projects are really keeping me busy. This project was inspired in part by the Rhianna Indiegogo campaign that was delivered recently. I love the camera, and the idea that there’s a bag to match is pretty nifty. The fabric is printed by Spoonflower and is basically a pattern printed on fabric of the bag complete with markings, directions, and a cute bonus key fob. In addition to the fabric, there’s a really great tutorial by HappySewLucky here.
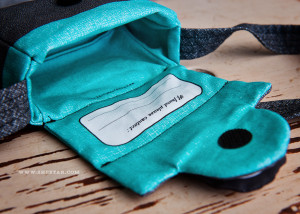
Overall, I found the sewing really easy. Line everything up carefully, follow the directions and it’s a breeze. One small change I made was to use fusible fleece instead of quilt batting since the instructions didn’t specify the quilt batting thickness (there are a variety of lofts available). I was able to iron the fleece to the fabric which made it MUCH easier since I wasn’t dealing with extra pins or basting and the fleece then didn’t shift around since it was fused to the fabric. The fabric info on the Spoonflower site says to order “Upholstery Weight Twill” which Spoonflower doesn’t make anymore – instead, they have Heavy Cotton Twill ($32/yd) and for the fat quarter needed for the project, the cost is $17, plus $2 for shipping brings us to a total of $19 for the fabric. The fleece I had lying around, so I have no idea what the cost would’ve been. The puff of stuffing for the lens I snagged from a stuffed toy the boydog had mostly eviscerated (he won’t miss pulling out one teensy bit of stuffing, right?). The velcro I did have to buy, and that was $1.99 for four sets of .75″ rounds, so only $.50 for the one set I used. Total project cost was under $20 which isn’t too bad! Between cutting out the fabric and sewing I think it took about an hour, and I’m no sewing expert. The pattern is VERY well marked and the instructions thorough, so that helped make it go fairly fast. The hardest part, by far, was turing the strap inside out which, in hindsight, I probably could’ve sewed right-side-out instead.
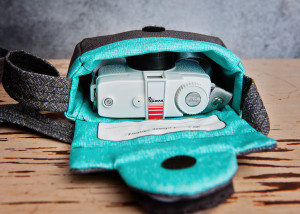
Overall? I’m pleased! The Rhianna fits very well inside the case, the stuffed lens bit does a great job of protecting the camera lens, and the bag is super fun to carry around. Plus, there’s a satisfaction and pride in knowing that this is something I made with my own two hands instead of bought in a store.