Category: <span>Brewing</span>

Local Meads

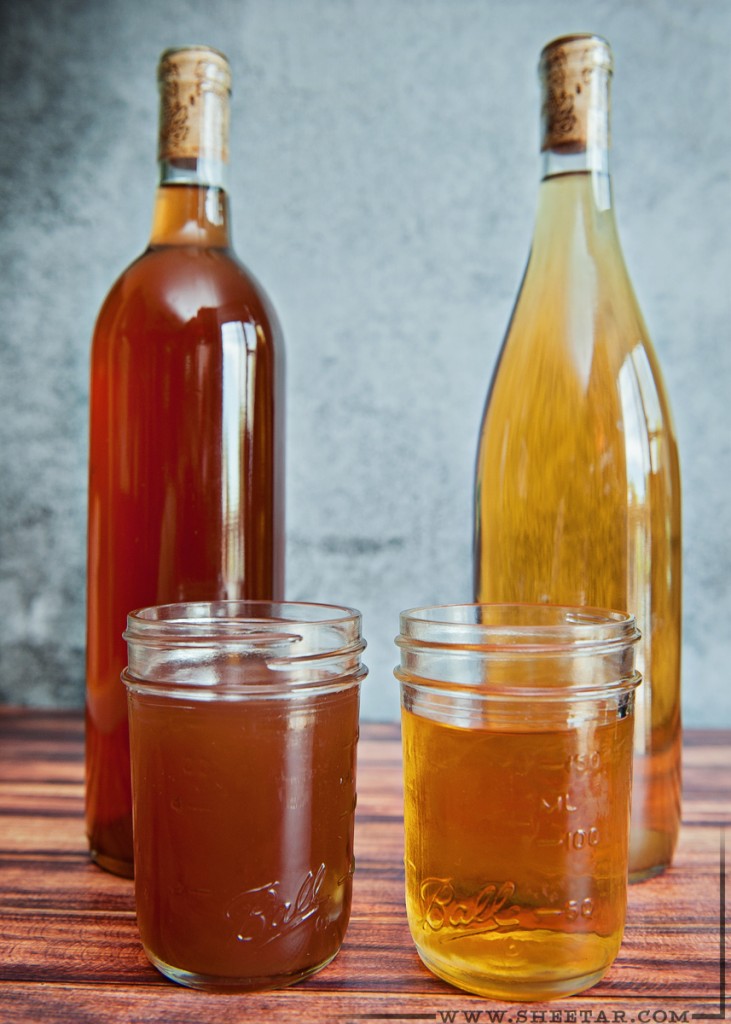
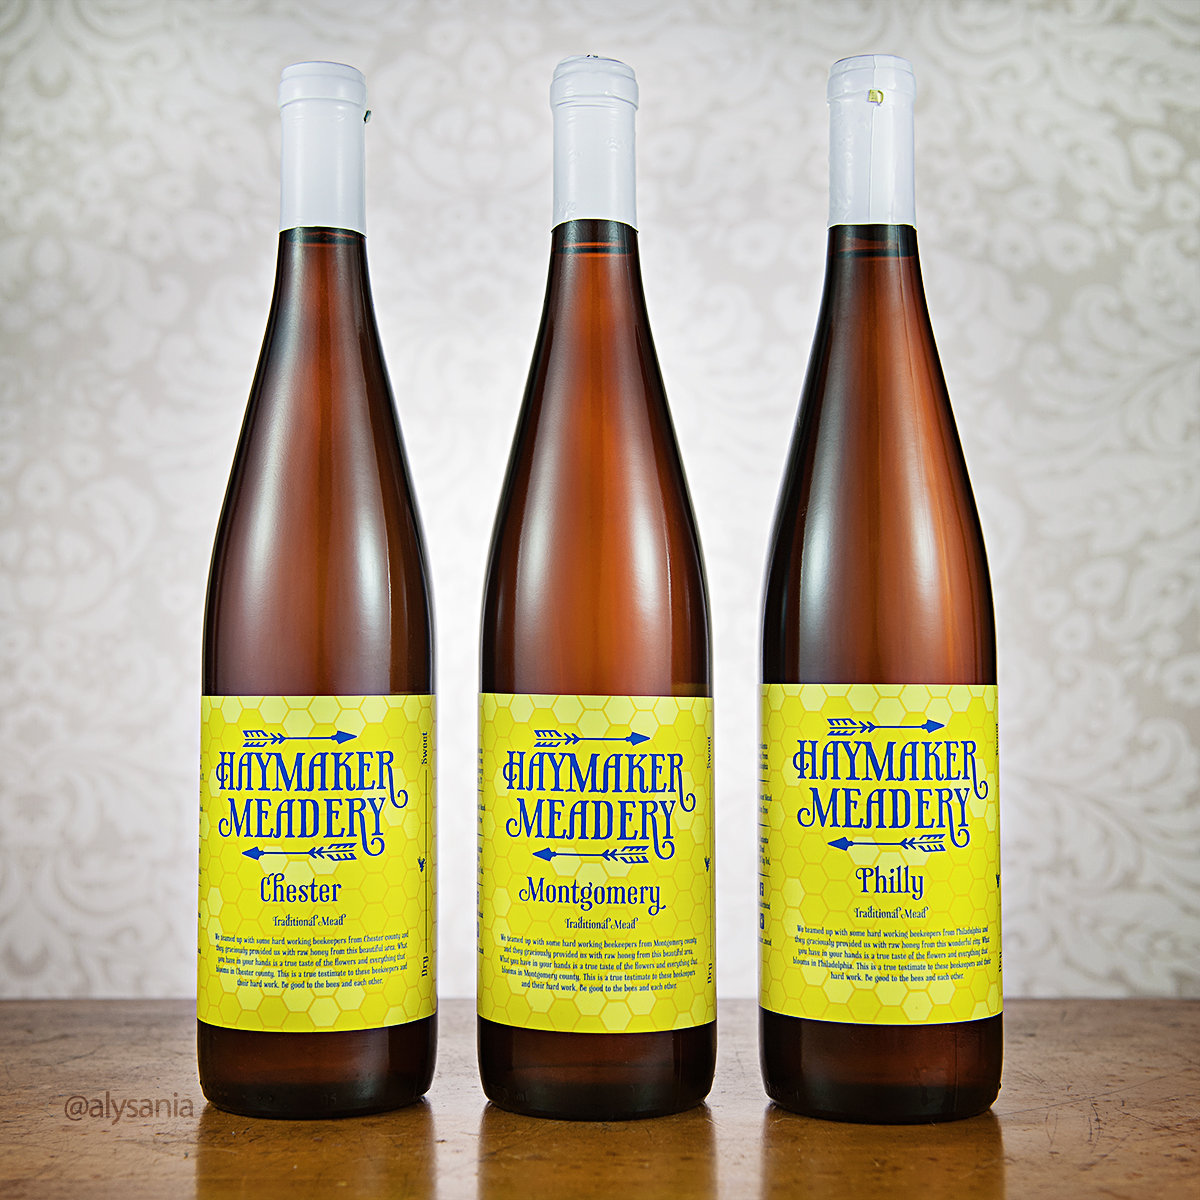
A local meadery, Haymaker Meadery, decided to run a fun competition among local beekeepers across three counties.   The idea was that beekeepers from Philadelphia, Chester, and Montgomery counties in Pennsylvania would bring in honey from their beehives which would then be turned into three separate meads using only honey from each individual county.   They collected the honey in August 2017 and in February 2018, the meads were finished, bottled, and ready to be tasted and judged.

Since I make mead at home as well, I was pretty psyched to be a part of this and rustled up two jars of honey to participate.   Each 2.5 lbs of honey is returned to the beekeeper in the form of a bottle of mead which is a pretty great trade!   Plus, participants also received a discount on purchases during the judging day.

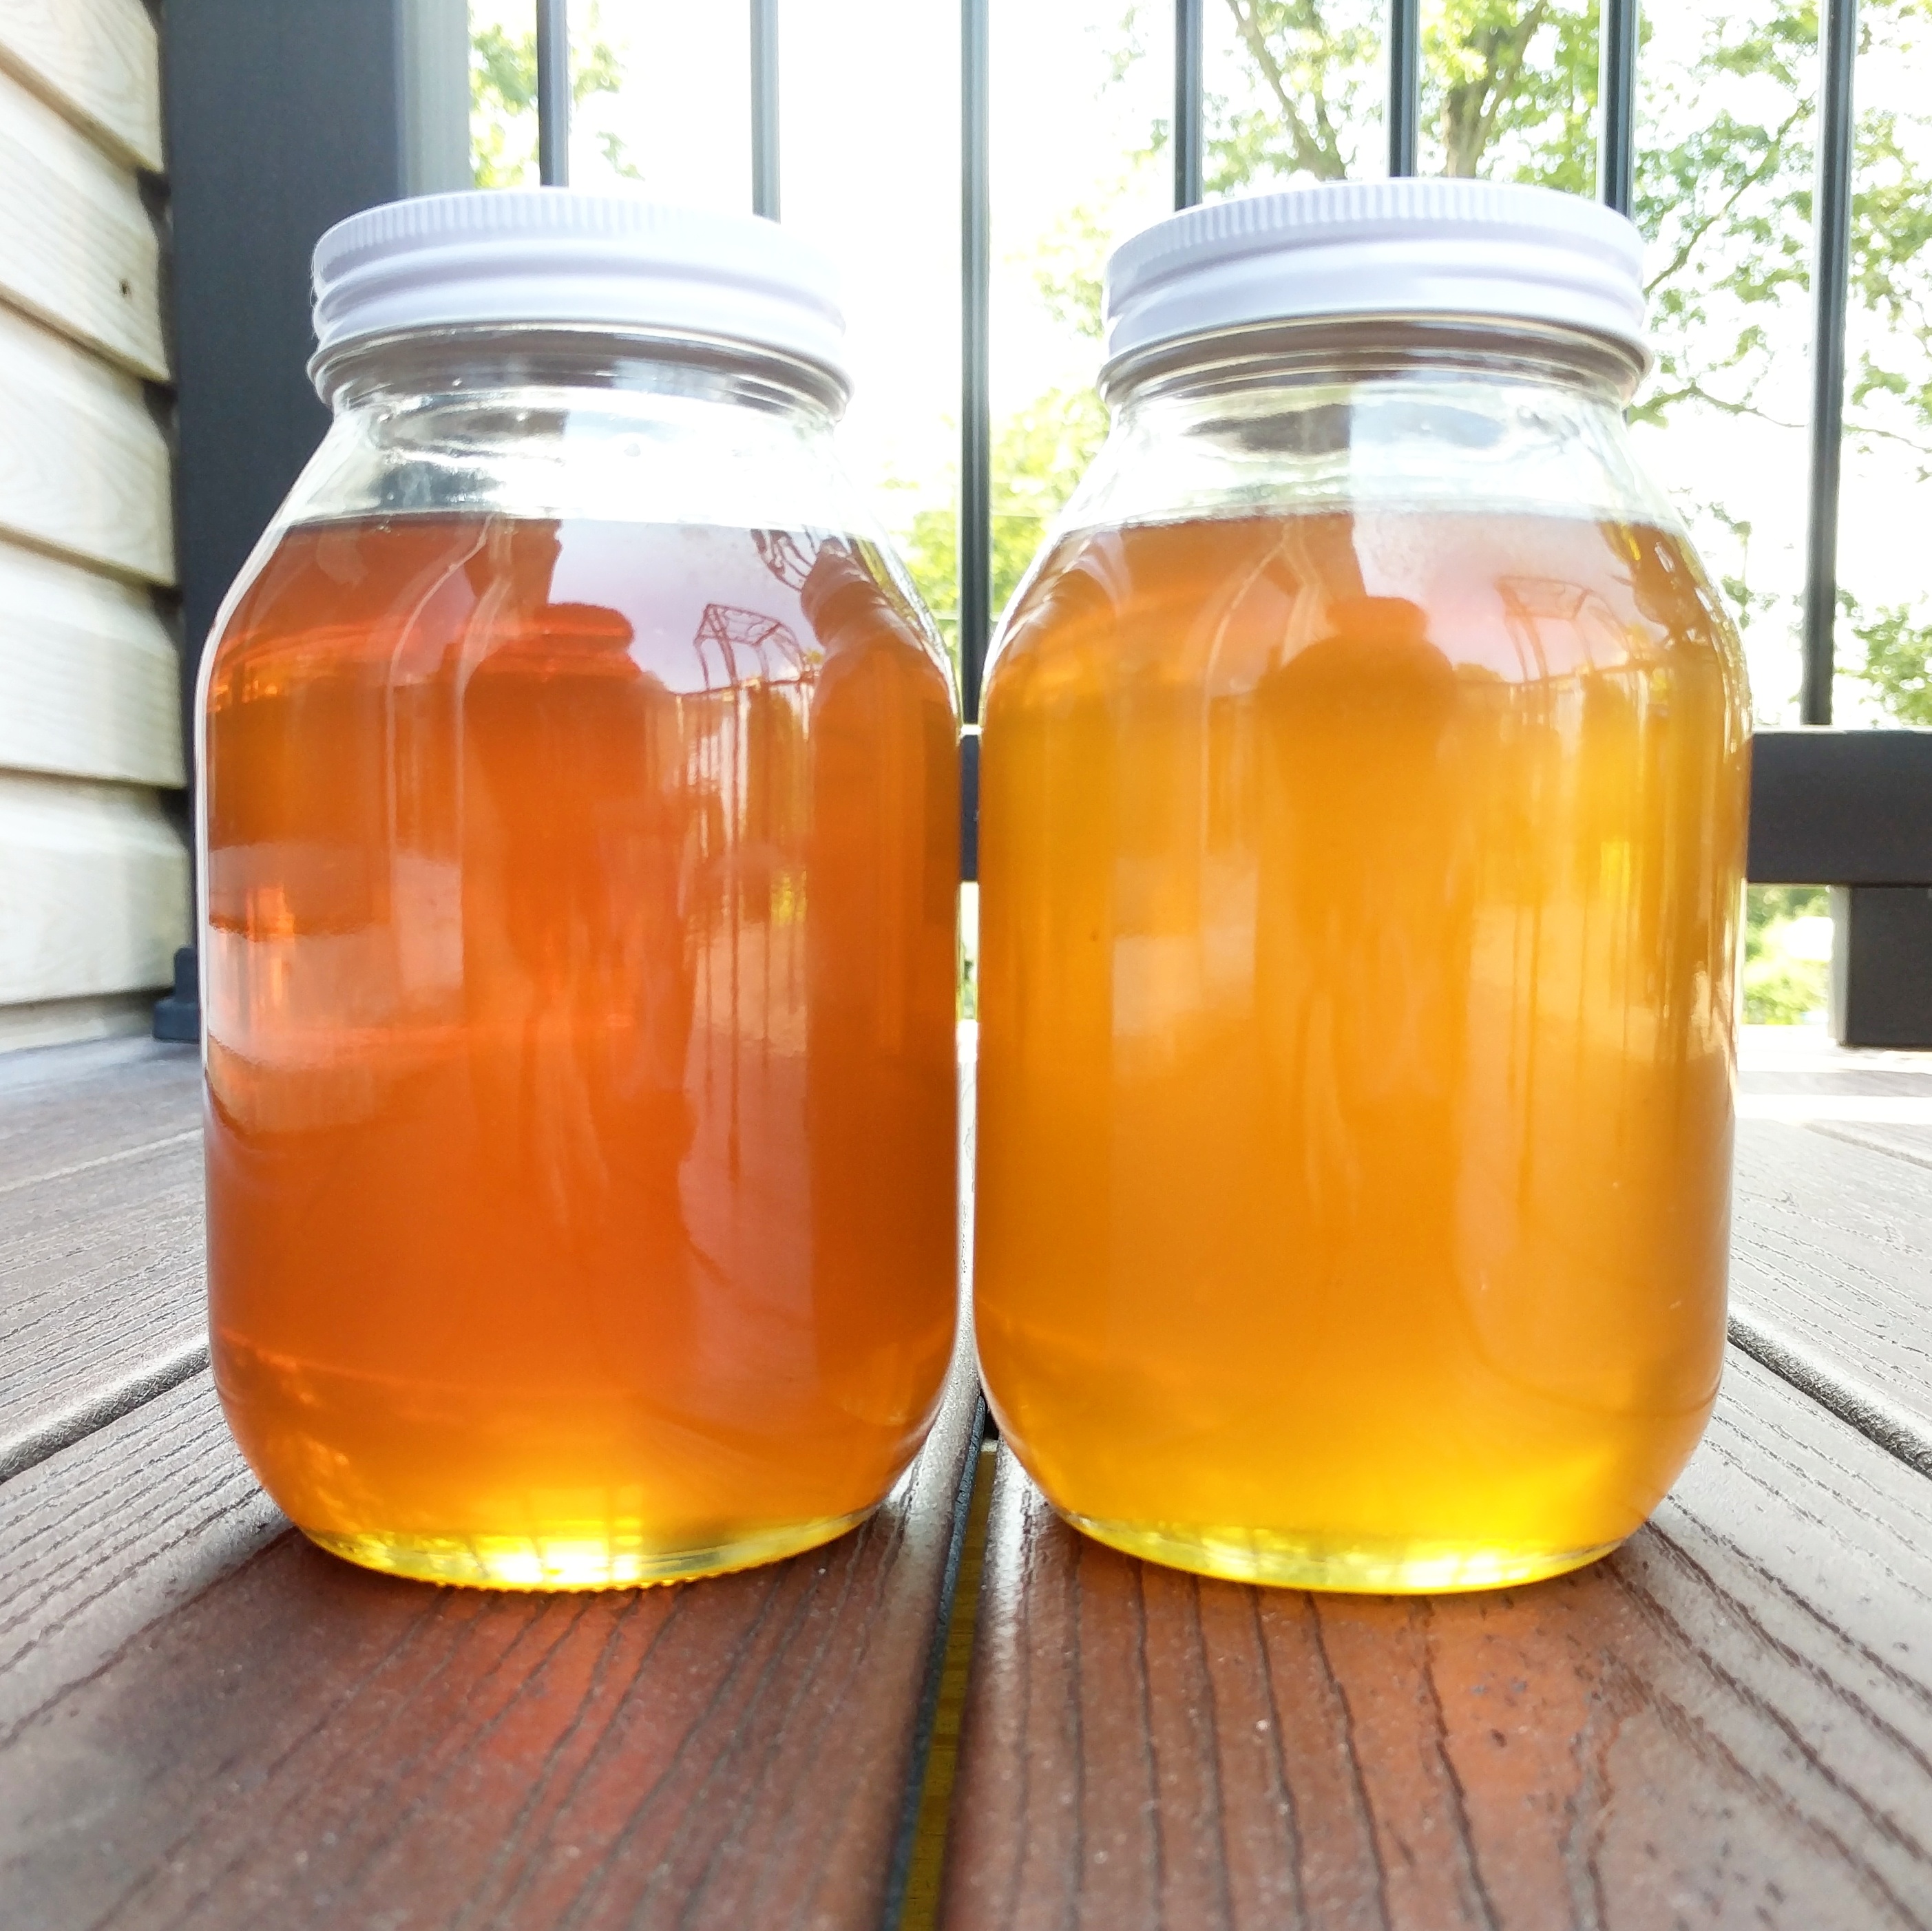
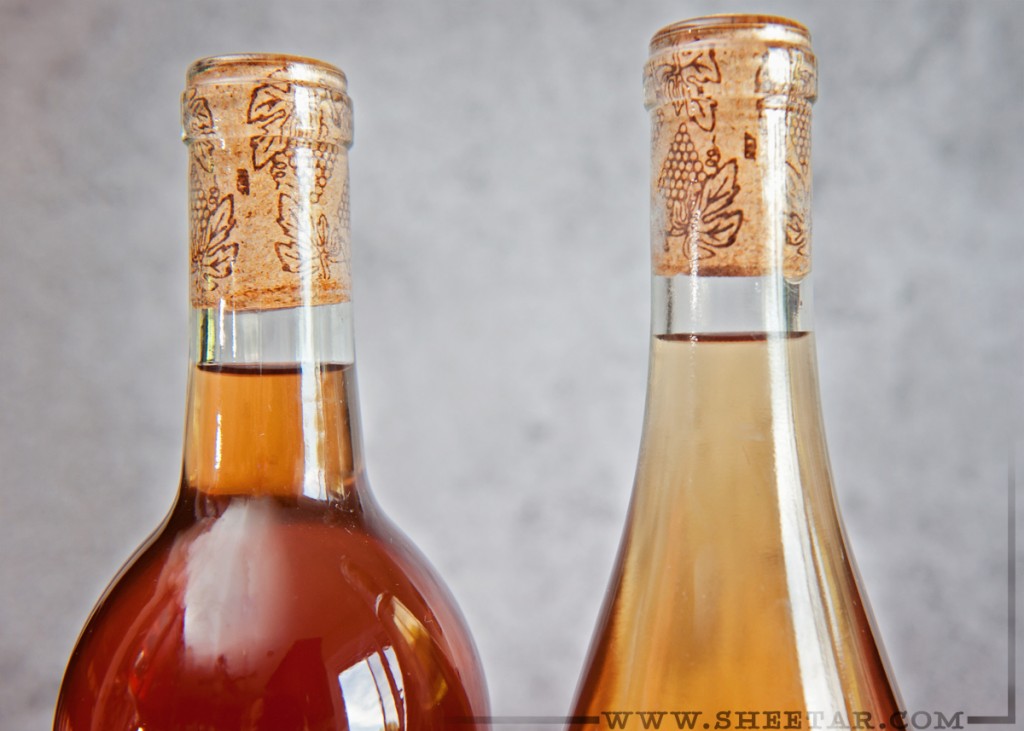
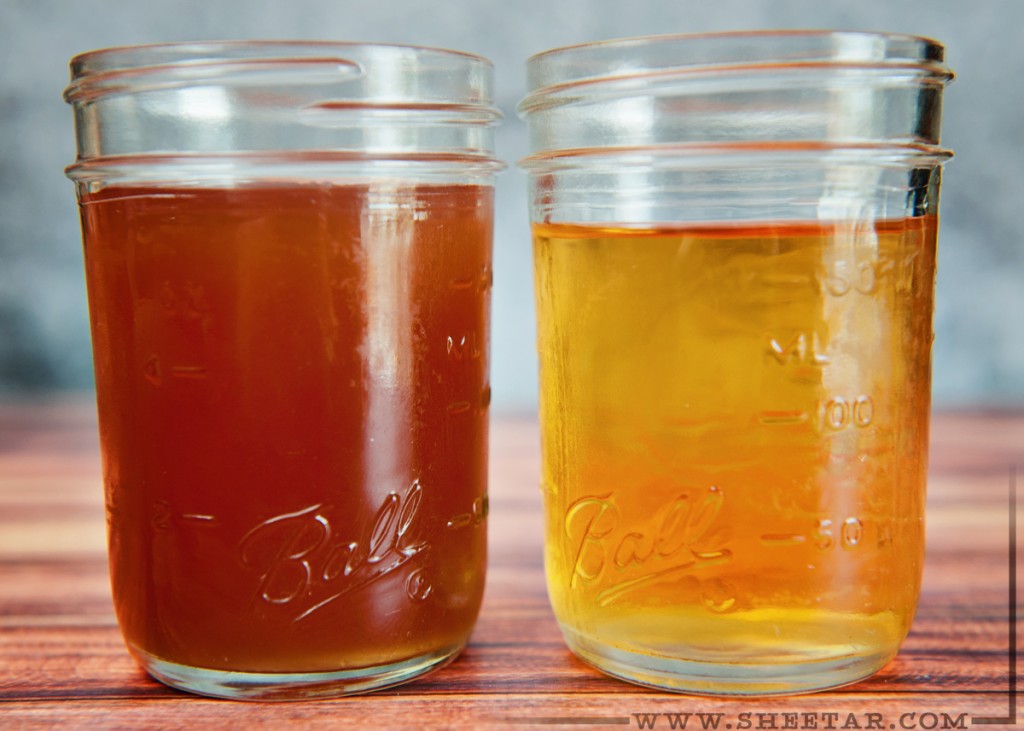
The honey in the photo above is late Summer honey from my hives, so it’s darker than its earlier Spring counterpart.   As part of Chester County’s mead, the final product was indeed the darker of the three meads, so I have to imagine I wasn’t the only one bringing in fresh, late summer honey that was probably mostly clover-based.   After judging, the winner was declared to be Montgomery County’s mead, a lighter mead reminiscent of a Riesling with a touch of lemon and floral notes.   I’ll hand it to Montgomery County bees and beeks – they really put together some lovely honey to create a great mead.   I mean, they’re all good, and I was hard-pressed to pick a favorite since they all have their merits, but it was neat to see that even a matter of 10 or 20 miles could create honeys so different and as a result, meads that were so different.   Haymaker Meadery is looking to start another round of county-specific meads this year on Mead Day in August of 2018, so beekeepers, be sure to set aside some honey to participate this year!   It’s exciting to see your honey made into a professional mead, and getting to chat with other area beekeepers while sipping on delicious meads at judging day is a fun way to spend a Saturday afternoon.   There may still be bottles of these three available at Haymaker, so I’d definitely suggest visiting the shop and trying some truly local flavor!

A Tale of Two Meads

MEAD!  When husband got into homebrewing beer, he made a batch of mead that came out really spectacular – won awards even!  When I saw how much less time-consuming it was than brewing beer, and tasted how good the results were, I stepped up and proclaimed myself as the household MEADSTRESS because awesome name, and then we could share in his  new hobby.  A bunch of years later, here we are, still brewing beer and making mead.  I’ve definitely gotten better (scored a 2nd place with an agave mead in the local Valhalla competition a few years ago), and here are my two latest attempts  – a Double Cherry Mead and a Ginger Mead.

Just the basics up here, recipes/details below the jump!  I’ve just finished Quality Assurance testing these two, so pardon spelling errors and any boozed-up-exuberance  🙂

DSC_7490
DSC_7507
DSC_7503
Double Cherry Mead  (left in the photo)
Double cherry, technically a melomel, was a combination of 4 quarts of Trader Joe’s Red Tart Cherry Juice and 2lbs of Yellow Cherries picked from a local orchard, frozen a few years back.  I picked SO many at the time because a friend and I went and we were gabbing away, filling up out buckets and before I knew it, BUCKET OF CHERRIES.  After a batch of jam and eating a ton of fresh cherries, I just didn’t know what to do with them all and stuffed them in bags in the freezer.  So hey, why not add them to mead?  The resulting mead didn’t really clear (probably a pectin haze), so it wouldn’t be able to go to competition like that, but I don’t really mind so much because it tastes SO great.  The tart juice adds a nice bite, and the whole cherries add this sort of earthy, warm character to it and keep it from tasting like cherry cough syrup.  That glass in the front is REALLY hazy only because it was the dregs at the bottom of the carboy.  The bottle in the back has already cleared a good bit and collected some sediment at the bottom.  19 wine bottles total from this 5 gallon batch.  I’m fighting the urge to drain one tonight.  Mead went from ingredients to bottle in one year!

Ginger Mead  
(on the right)
HOOBOY.  I wasn’t sure this was even going to work at all.  I started out with WAY too little honey in the mead in May 2011.  It sat, ruminated, and went wrong for two years before I checked it in April 2013.  It was .. off.  Dry, but not a good dry, very little ginger character, and the alcohol content was WAY too low.  I figured it could be saved, so I added more honey and a buttload of ginger, repitched the yeast, and crossed my fingers.  Well, two pounds of ginger later, I have a winner.  Ginger tickles the nose and gently dances across  the tongue without burning.  It really is JUST the right blend of ginger and honey to be sweet without cloying, spicy without hurting.  It cleared VERY nicely – all the ginger dropped to the bottom.  Some of the grated ginger slipped into the bottles, but I figure that can’t hurt too much.  Ended up with 16 wine bottles, 11 beer bottles (with sugar added for carbonation), and 3 of the 22oz bottles (also carbonated).  I added plain brown sugar for carbonation (about 1/4 tsp per bottle) which isn’t the best way to do it, I know, but we’re not going for scientific here.  This is just a test to see how it turns out.  The big inspiration for this batch was to make a carbonated mead that was like alcoholic ginger beer.  If the carbonated bottles turn out well, I’ll do another batch and carbonate the whole thing properly with a bucket and priming sugar and all that jazz.  We’re affectionately calling this the Red-Headed Stepchild, and I even got confirmation from a red-headed stepchild that this name is wildly appropriate.


And now the jump, read on for more details about the recipes and brewing.

Continue reading“A Tale of Two Meads”

Making Vinegar

The blog has been a little silent, mostly because I’ve been too busy shovelling all winter long.  Whew.  I think we’re up to #3 snowiest winter ever, and from the looks of the forecast, we’re not done quite yet though there was some loud, house-shaking thunder this morning accompanied by freezing rain.  But hey, the last two winters I think we only managed about six inches of snow each, so it’s nice to have a proper winter again.  I do like everything to be covered in snow rather than trudging around in a mushy, muddy mess.

We’ve been up to something new!  Husband found an advertisement for a vinegar making kit in a magazine and hinted about it around Giftmas time.  So, I took the hint, and it ended up being his present.  The kit, purchased from The Brooklyn Kitchen, didn’t include the vinegar mother or culture for starting the vinegar, so I had to purchase that separately.  Basically, it’s a bacteria that converts alcohol into acetic acid.  The amout of alcohol in your starter liquid (beer, wine, hard cider) is the amount of acid you’ll have in your vinegar.  You want something around 5-7 percent alcohol, so if you’re using wine, you need to dilute it by half with water, and make sure it doesn’t have any preservatives or sulfites that will kill the vinegar mother.  The mother will slowly form as a slimy, gelatinous layer on top of the liquid.  It’s totally safe and completely harmless.  It likes to work at a higher temperature (85 degrees F), but we don’t keep our house that warm in the winter, so it just takes longer, no big deal.  For more information on making vinegar, check out this link.

Husband was pretty excited to get going on his vinegar, so he grabbed a case of Yuengling Premium and loaded up the barrel which means we get a malt vinegar (perfect for french fries).  It sat from December through February and we finally bottled it February 16th.  The information told us that when it starts to smell like nail polish remover, it’s almost done.  Sure enough, that day rolled around about three weeks ago, so we let it sit a little while longer just to be sure.  We bottled the finished vinegar into two 8 oz bottles and shared one with the neighbors.  It’s not much, and we left a good bit of starter liquid behind, but the resulting vinegar for our first go is really good!  Because this was the first use of the barrel, the vinegar picked up a TON of oak from the fresh char on the inside.  We even took a chunk of the mother out to start another glass container with a botched batch of mead to make a mead vinegar.  That should be interesting!  We decided not to pasteurize the vinegar (which would kill the bacteria and allow it to be stored at room temperature) and instead are keeping the bottle in the fridge.

DSC_7109 DSC_7110
DSC_7112
DSC_7113

Today I decided we needed a label for the bottle, so I found a template and slapped together a small label for the wee bottle (the label only measures about 4″ high by 1.5″ wide).  I found a sheet of gummed label paper we used for homebrewing and printed out a sheet of labels that we can use on future bottlings.  I’m pretty happy with how they came out!

Vinegar Barrel – The Brooklyn Kitchen – $100
Malt Vinegar Mother – Beer & Winemaking – $17.99
Label Paper – Midwest Supplies – $5.99
Bormioli Rocco Bottle – Everything Kitchens – $2.99 (We found ours at a local store for less)
Label Template – World Label – FREE
Fonts: Marshall (“Oak Aged”) – Guttenberg MF (“Malt Vinegar”) – Horizon Wide (“Phoenixville”) – Savanne (“Date, Batch, Base”)

Brew Day

It was a multiple brew day.  Whew!  For a little background, the husband started homebrewing a few years ago and I started a batch or two of mead this year.  I was surprised and thrilled when my Agave Mead won 2nd place out of 31 entries in its category and things have taken off from there.

Every year, the homebrew club does a competition called the Iron Brewer based on the second runnings from a brew pub’s Barley Wine.  Everyone starts with the same wort from the second runnings and adds only one pound of fermentables (steeping whatever you can dream up) and then in a few months, the brewers at the pub judge the entries.  Last year, the husband was around and did the competition, but he isn’t in town for pick-up day this year, so I stepped up and said that we should do a team effort brew so that we can still take advantage of this awesome opportunity.  Having tasted a really great Saison at the same local brew pub, I asked if we could do a Saison (French farmhouse ale) using the wort and the husband said it was possible.  I went and picked up my bucket of wort (from 100% Weyermann Pilsner grain) and lugged it home today.  I’ve never brewed beer before – just mead – so I’ve had a bit of help from the husband.  He ground up the malt I brought home yesterday and even got a yeast starter ready for me as well as helped with directions so that I could do everything today while he’s out of town.  I managed to lug the 5 gallons of wort up the stairs and fill the brew pot and get the pot on the stove without spilling anything.  Steeped the malts, added the Sterling hops at boil and then the Saaz for the last 15 minutes, going by a recipe I had found online.  Ran the wort chiller and got the temperature down, drained it into a carboy and pitched in the yeast.  Everything went well and there were no disasters!  Granted, I still don’t know much about brewing beer since I was mostly following directions, but it will be fun to see how it comes out (and have a finished product in less than three months!).

Since I had all the equipment out and ready to go, I figured I’d do a few other things since I had the time.  There was a prickly pear agave mead and a mesquite honey mead that refused to clear (in well over 6 months), so I hit them both with a little sparkalloid and hopefully they’ll finally clear out.  Then it was on to brew another batch of mead.  This one is a modification of the last agave mead with less agave and a 1 liter container of passion fruit juice added.  I was looking to add a little more acid and a little less sugar overall.  It should work out well, but you just never know.

So, that’s it for today.  I feel pretty productive!  Hopefully I’ll be finishing up a pair of socks I’ve been test knitting and will have details of that coming up in the next post.